
Hi! I’m back. I recently got very busy with moving from Aichi to Tokyo. And I also had to do training for my new type of work! Anyways, as promised, here is how you can have your very own Maiko/Geisha Experience in Kyoto.
First off, what is a Maiko/Geisha?
A Geisha is a popular and important part of Japanese culture. They are the women who entertain by performing traditional songs, dance, and art. A Maiko, or apprentice, is considered as the peak of Japanese beauty and femininity. And contrary to popular belief, maiko and geisha are not the Eastern equivalent of prostitutes. They are artists trained to perform and preserve traditional arts.

It takes years of school, training and real-life practice to be promoted from maiko to full-fledged geisha.
Thankfully, you can have a taste of at least a little part of this important heritage through a make-over experience.

Gion Aya Make-over Experience offers ladies of all ages the chance to feel like a traditional geisha or maiko for a few hours. You can check out their website and make your own reservation here.
So, after making and confirming your reservation, you’ll need to arrive at the shop at least 10 minutes before your schedule.
Before the make-over, you’ll have to sign forms (English translation are also written). You will also have to choose at least 4 poses from their guide book. Every season, they offer special poses and props, so make sure to try them at least once.
Next stop will be the dressing room. Undergarments are allowed, but everything else will be put in a locker, including jewelry. Phones and cameras are placed in a small bag you can carry along the stages of the make-over.
They will provide you with a kimono undergarment and a pair of tabi (socks). If you’re a first-timer, there is a poster in the locker showing how to properly wear these clothes. If still unsure, you can ask the staff to help you. They are all very kind and speak English.

After changing clothes, you will be escorted to the make-up room. One suggestion: try to go to the toilet before this stage – you’ll thank me later. (^_−)☆
In the make-up room, you’ll be introduced to your make-up artist/dresser. In my case, it was Yukiko-san, a kimono-dresser instructor in a nearby school. She can understand and speak English well, so I had no problem with communication.
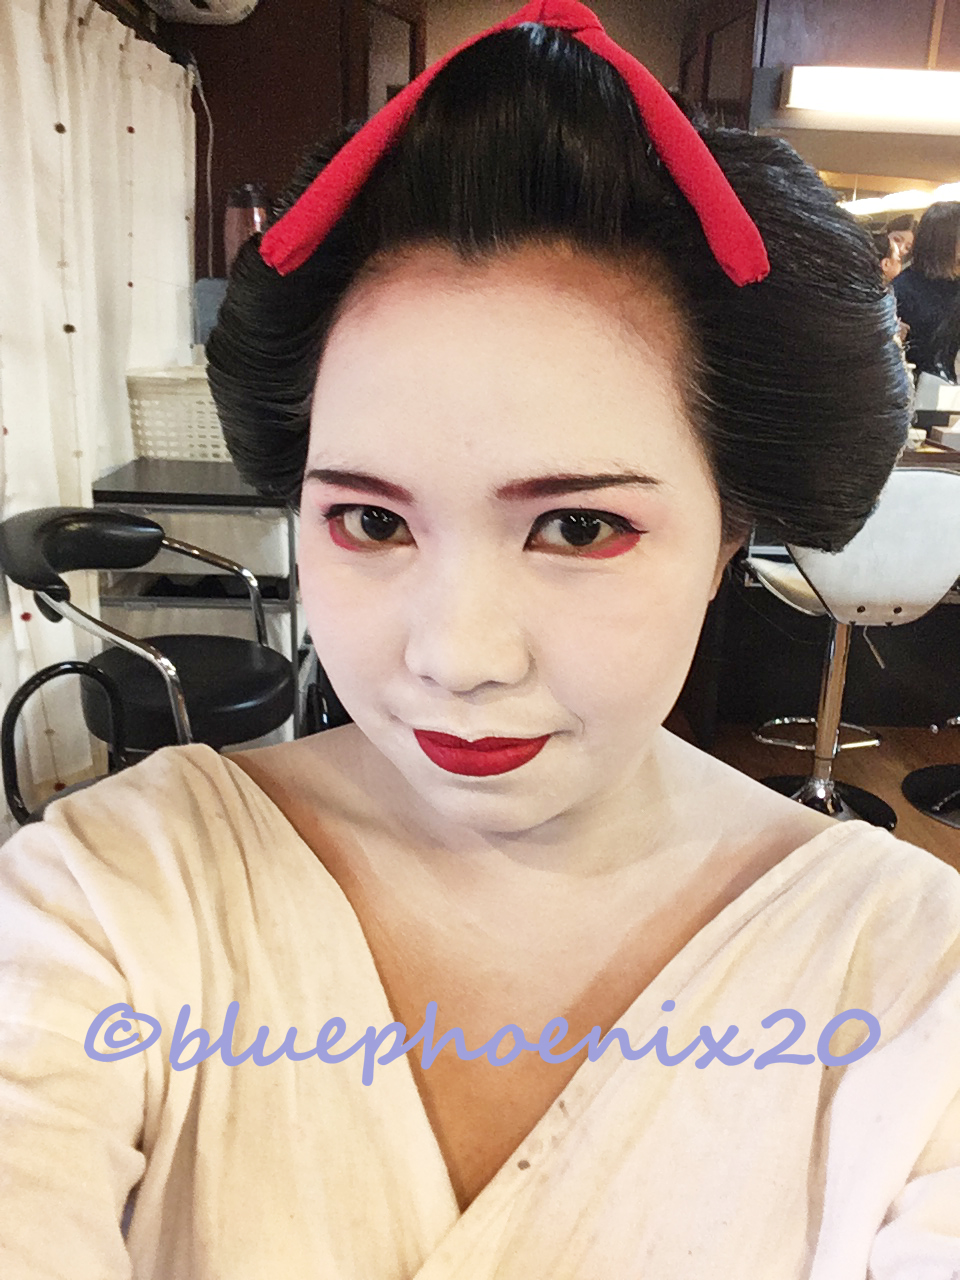
Yukiko-san gave me two options for make-up which will suit my round face: kawaii (cute) or elegant. We both agreed that softer make-up will look good on my features (round face with small round eyes, full nose, and full lips) so, we opted for kawaii. Turns out it means that I’ll be wearing a lot of pink on my face!
Maiko make-up is quite difficult to explain, but I shall do my best:
- Hair was bundled and secured with a mesh net. Since my hair was a bit long, a portion from the front was separated to be used later on the wig.
- A layer of wax was first applied to protect the skin. It smelled a bit bad, but it was important so that the skin wouldn’t dry under layers of foundation.
- White liquid foundation was applied around the upper face. Even the eyebrows were covered with this foundation. A thin space before the hairline was left as was traditional.
- Eye make-up was next. I’m not sure what Yukiko-san used, but there were eye shadows of different shades of pink and red. Then I had to keep my eyes closed while she applied very cold liquid eyeliner.
- While waiting for the eyeliner to dry, thinner eyebrow lines were drawn over my original eyebrows. She used a combination of black, brown and red to tie it all in.
- Then the rest of the face is covered with the same white foundation (including the lips!). The distinct 3 triangle patterns of a Maiko were also drawn at the back.
- To finish everything else, bright red lipstick was applied on the lips. As was in the old time, the bottom lip was fully red, and only a portion of the upper lip was painted. This gave the illusion of fuller bottom lip than I originally had.
The make-up process took about 30-45 minutes at least. There were many layers and retouches as the foundation dries. But I think it was all worth it.

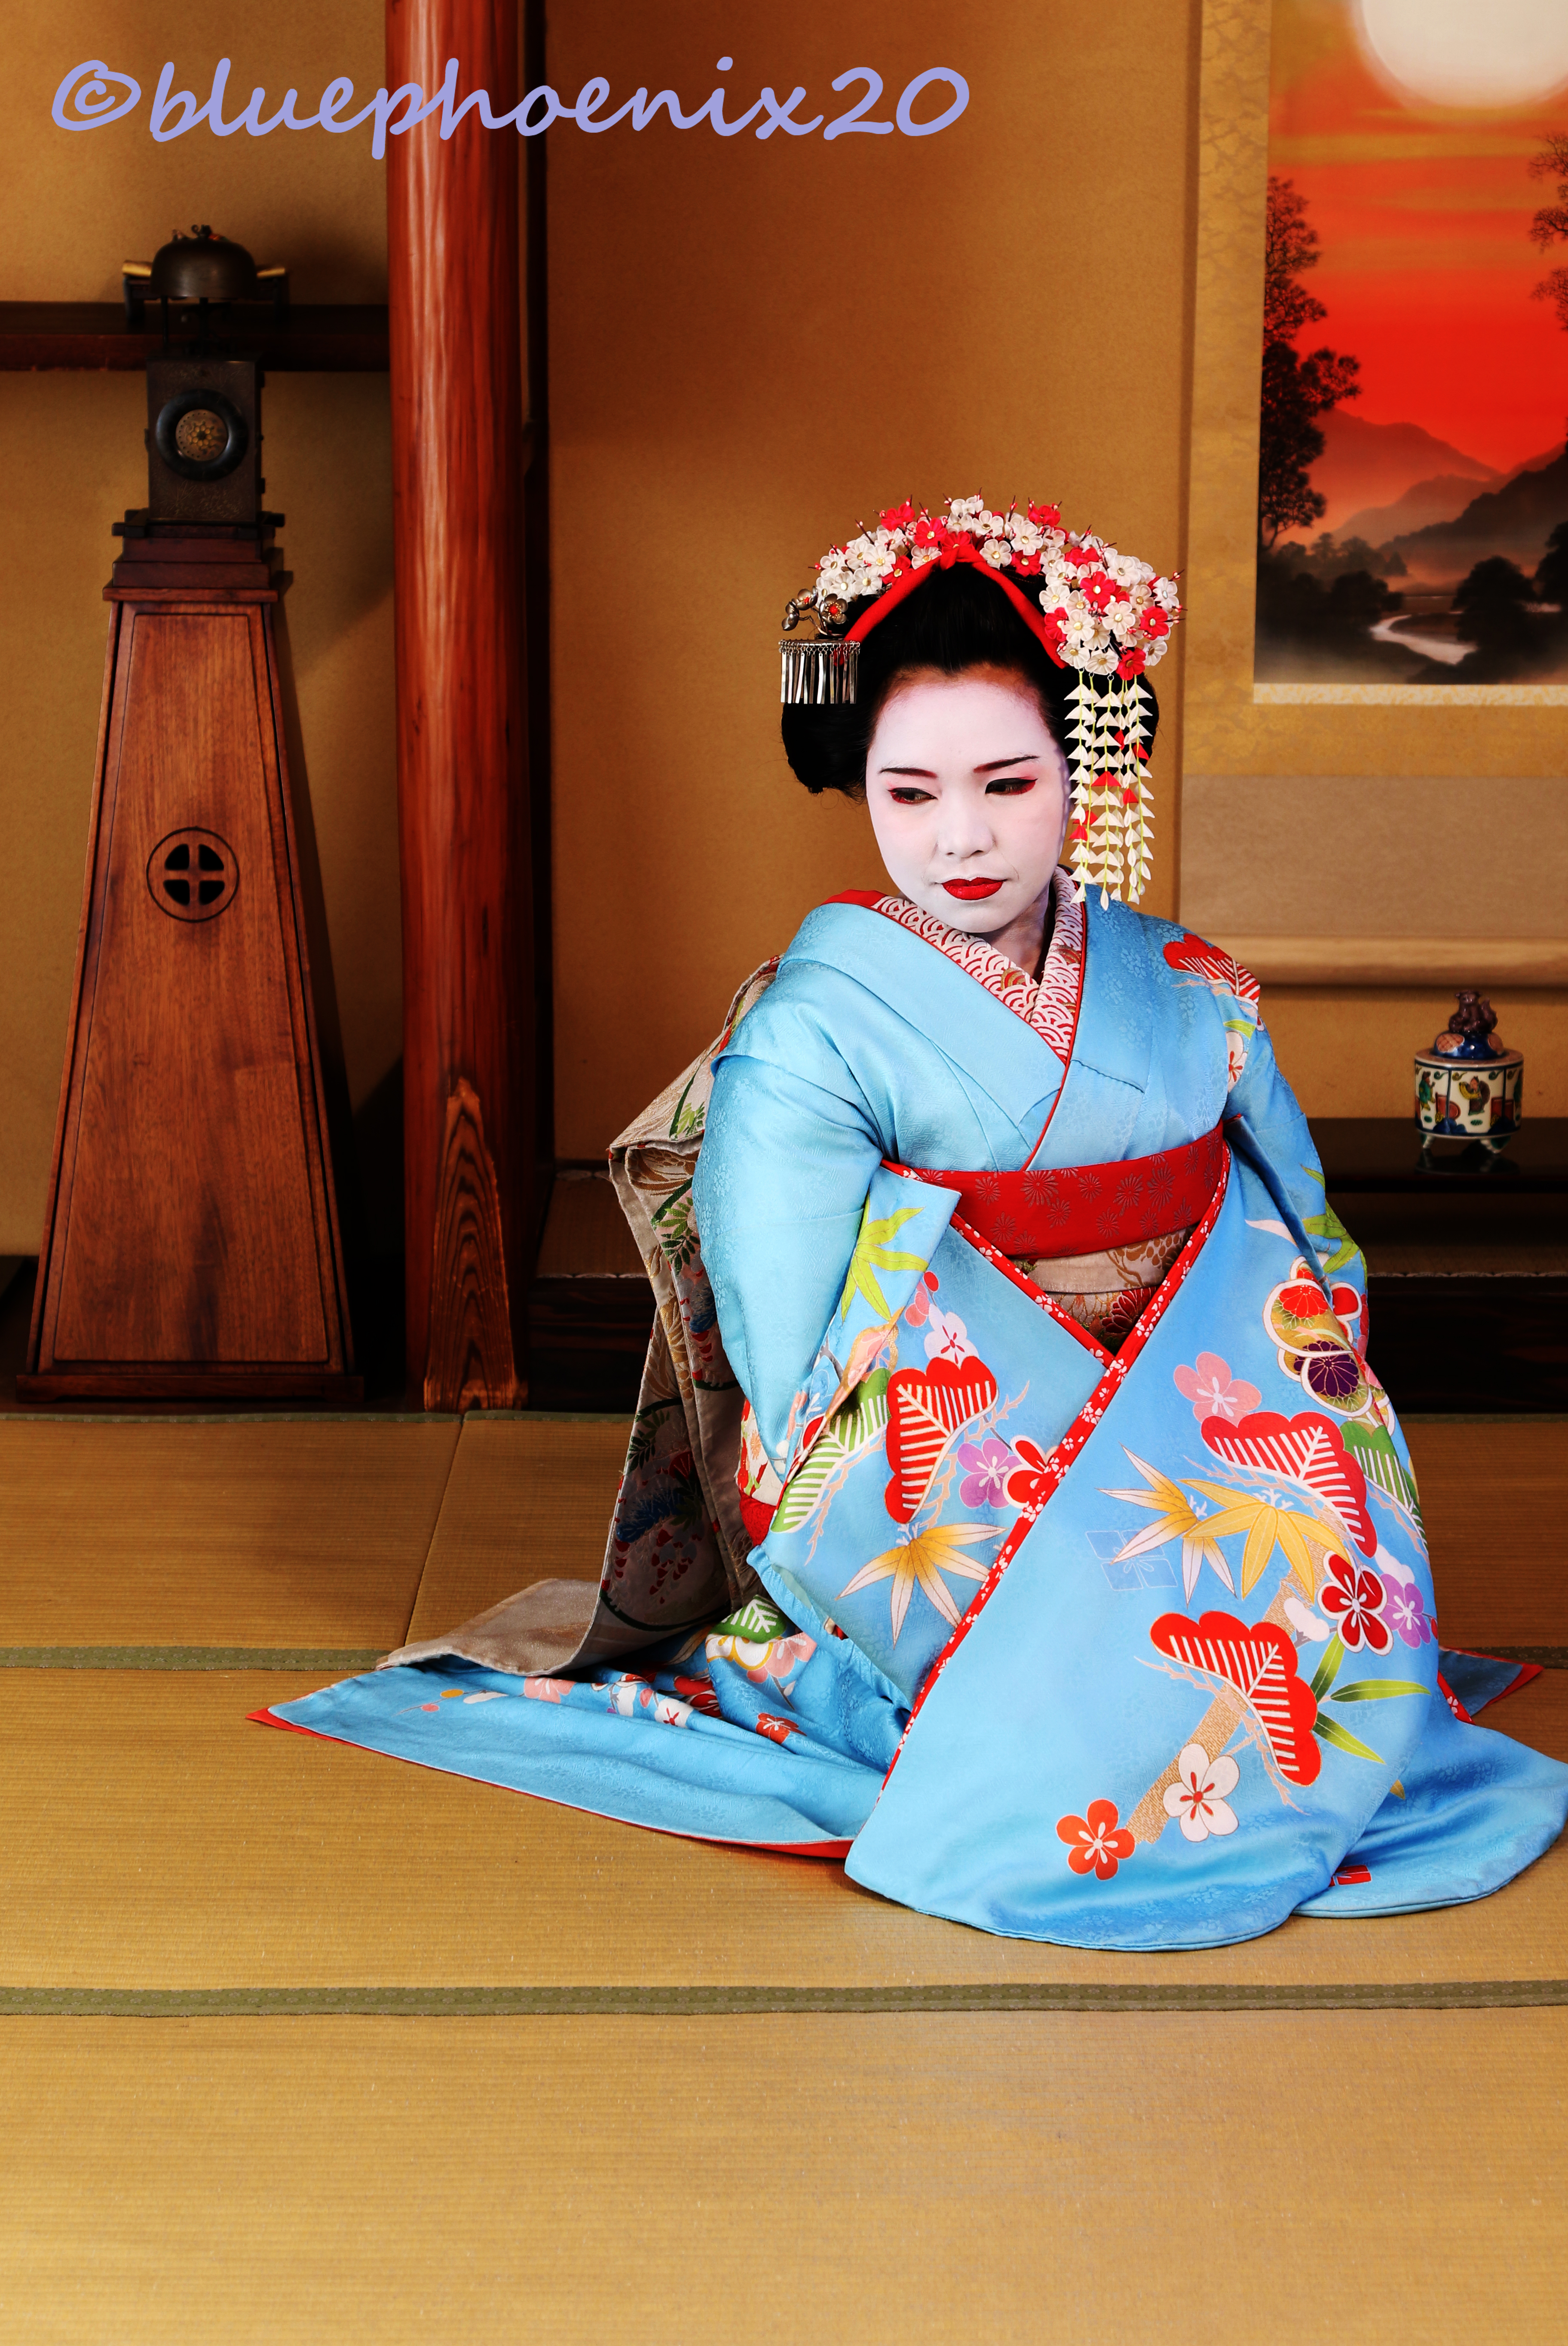
After the make-up, the wig is attached next. The wig they gave me was arranged in wareshinobu hairstyle, which was what traditional maiko used to wear on their formal debut. The wig was sewn on the mesh net cover to keep it in place. The front part of the wig was covered by my real hair which was pulled and secured using bobby pins. Yukiko-san had to use a black dye spray to hide the brown streaks of my hair into the wig.
Of course, true maiko and geisha did not wear wigs. They had really long hair that was arranged into intricate and symbolic styles befitting their status. According to Yukiko-san, maiko/geisha had their hairs styled washed and styled only once a week year-round, and at least thrice a week during summer. The rest of the time, they had to keep their hair up at all times of the day. Talk about dedication!
Finally, it was time to put on the kimono. All I had to do was stand still, while the dresser did everything else. As with the make-up, putting on a formal kimono is an intricate task with lots of layers (literally!):
- A half-slip cover was placed on top of the kimono undergarment.
- Then a hard collar was attached around the shoulder. This will hold the shape of the kimono later on, and show the triangle marks at the back.
- I’m not quite sure what it was called, but layers of padding were wrapped around the waist and secured with strips of cloth.
- A thin white kimono with a red and gold collar was worn over everything.
- Then the silk kimono (of your choosing) was next. Formal kimono has long sleeves, and the hem goes over the feet. This was also secured with strips of cloth.
- A small padded pillow was placed at the back. It will be used to create the drum design of the obi.
- Next up is the long (and I mean LOOOONNNGGG) obi. It was wrapped around the waist multiple times and secured at the back. After it was wrapped, we noticed that my body looked straight and flat (I am quite curvy and full-bodied). Yukiko-san joked that to wear a kimono, you have to accept looking flat-chested. LOL!
- The long obi was tied at the back over the padding. Then a smaller obi with contrasting design was tied around the waist. Lastly, a decorative belt cord was placed over the obi.
- Final touches were the hair ornaments. Since my birth month was February, Yukiko-san suggested plum blossoms pins.

Dressing probably took another 20-30 minutes and I think I was wearing at least 10 layers of cloth after all that. There were certain rules on how to wear formal kimono, like which side to put inside and how to properly fold the excess fabric. Good thing the dressers at Gion Aya are all professionals at this. They will help you select the best style and color of kimono, and dress you up deftly and efficiently.
After dressing, it was time for the professional photographer to take the pre-selected photos. The studio was like a formal teahouse, with extra space for close-up shots.

I admit I am not very good at posing pictures. But with the help of the photographer, Mayumi-san, I think my photos came out quite good. She directed me where to sit, stand and look. It was actually fun!
She took at least a dozen of posed photos and two candid shots. For the package I chose, 4 of those poses were printed, and everything else were saved in an USB device. One candid shot was printed in wallet-size and I was asked to write a message on it. This would be added to their guest book along with all their clients’ photos.

After the professional photo shoot, I was given 10 minutes of free time. If I had a companion at that time, maybe we could do our own photo shoot anywhere. But I was by myself, so all I could take was a lot of selfies and videos. Mayumi-san was kind enough to accompany me for a few minutes and took some photos of using my phone. XD
After the free time, another staff helped me to undress all the layers of the kimono. Then I was led to the locker to wash my hair and face. I had to use a lot of baby oil and cotton wipes to completely remove all traces of the thick make-up. I also had to wash my hair over the sink, which was a little uncomfortable.
When I was dressed and back to my old self, I just had to wait for the printed photos and soft copy. In the waiting room, I was accompanied by the other guests’ male companions. Since the guys only need to change clothes into traditional male kimono, they had to wait for their ladies to finish make-up and put on the layered formal kimono (a good hour or so).
It was a funny sight, actually. It was a good thing the waiting room had a lot of outlets and free puzzle games. (^v^)
After I received the printed and soft copies, all that was left was payment. For the package I chose, I spent around ¥15,000 which I paid using credit card. Different packages have different rates, and you can also have other add ons. You can check out Gion Aya’s prices here.
I truly believe that a Kyoto adventure wouldn’t be complete without trying this. And I highly recommend Gion Aya for a greatly memorable experience. This is one of the best moments in my life, and I am really glad I got to do it in my 20s. LOL!
So, don’t forget to include this in your Japan adventure itinerary. 🙂
